Pages

Affichage des articles dont le libellé est technique. Afficher tous les articles

samedi 18 avril 2020

Fabric Mask Tutorial

When I decided to make a few masks last week I read several tutorials and posts. I chose the version that spoke to me the most among those available on the Internet and for which I had all supplies. I hadn't any elastic in my stash so I went for the ties. Actually this may be a better option with the thought of repeated cleaning. I also heard that elastic can be irritating around the ears over time.

Quand j'ai décidé de réaliser quelques masques la semaine dernière, j'ai lu plusieurs tutoriels et publications. J'ai choisi la version qui me parlait le plus parmi toutes celles disponibles sur Internet et pour laquelle j'avais toutes les fournitures. Je n'avais pas d'élastique dans mon stock, donc j'ai opté pour les attaches. C'est peut-être une meilleure option dans l'idée de lavages répétés. J'ai aussi entendu dire que les élastiques peuvent irriter autour des oreilles sur une longue durée.

Luna Lovequilts - Fabric mask with three layers and ties

I compiled here some information and step-by-step instructions.
J'ai réuni ici des informations et les instructions pas-à-pas.

✂✂✂

1 - Prewash your fabrics. Use preferably 100% cotton fabric because of frequent washing. Quilting fabrics work well !
It is a three-layers mask so you will need a front, a back and an inside piece of fabric for each mask as well as strips for the ties.
Use preferably two different fabrics so that it will be easy to identify the front and back of the mask.
For the inside fabric I use a light solid fabric which is tightly woven and that I don't like to use in my quilting projects for that reason ...

1 - Prélavez vos tissus. Utilisez de préférence du tissu 100% coton à cause des lavages fréquents. Les tissus qualité patchwork vont bien ! 
C'est un masque à trois couches donc vous aurez besoin d'un morceau de tissu pour le devant, le dos et l'intérieur, ainsi que des bandes pour les attaches.
Utilisez de préférence deux tissus différents pour pouvoir identifier facilement le devant et le dos du masque.
Pour le tissu intérieur, j'utilise un tissu clair uni qui est tissé très serré et que je n'aime pas utiliser dans mes projets de quilting pour cette raison ... 

✂✂✂

2 -  Cut a  9" (width) x 8" (height) piece of each of your three fabrics. This size fits my son and me for example.

2 - Coupez une pièce de 9" (largeur) x 8" (hauteur) dans chacun de vos trois tissus. En centimètres, environ 23 x 21 cm. Cette taille convient pour mon fils et moi par exemple.

Luna Lovequilts - Fabric mask tutorial - Three layers and ties

3 - Layer your three pieces. First the inside fabric and then place on top back and front pieces right sides together.

3 - Empiler vos trois pièces. D'abord le tissu intérieur et ensuite placez au-dessus les pièces devant et dos, bon côté contre bon côté.

Luna Lovequilts - Fabric mask tutorial - Three layers of fabric

4 - Pin and stitch the three layers together a quarter inch from the edge, along the two 9" sides (top and bottom of the mask).

4 - Epinglez et cousez ensemble les trois couches à un quart d'inch du bord, le long des deux côtés de 9" (haut et bas du masque).

Luna Lovequilts - Fabric mask tutorial - Three layers of fabric

5 - Turn right sides out and press carefully. Top stitch along the two sides. Your piece should be 9" x 7.5".

5 - Tournez la pièce dans le bon sens et repassez soigneusement. Surpiquez le long des deux côtés. Votre pièce devrait mesurer environ 9" x 7.5"

Luna Lovequilts - Fabric mask tutorial - Three layers of fabric

6 - If like me you need to have precise measurements to make even pleats you can follow the diagram  below ... ;-) But uneven pleats work too and you can skip this step ... Mark the placement of the pleats with a pen, starting from the bottom, on both sides of the mask (six marks on each side in all).

6 - Si comme moi vous aimez avoir des mesures précises pour réaliser les plis vous pouvez suivre le diagramme ci-dessous ... ;-) Mais des plis irréguliers marchent aussi et vous pouvez ignorer cette étape ... Marquez l'emplacement des plis avec un stylo, en partant du bas, sur les deux côtés du masque (en tout six repères de chaque côté).

Luna Lovequilts - Fabric mask tutorial - Making the pleats

Luna Lovequilts - Fabric mask tutorial - Making the pleats

7 - Bring one mark over to the next to make the pleat and pin in place. All pleats are in the same direction, towards the bottom of the mask.

7 - Faites coïncider chaque repère avec le suivant pour créer le pli et épinglez. Tous les plis sont dans le même sens, contre le bas du masque.

Luna Lovequilts - Fabric mask tutorial - Making the pleats

Luna Lovequilts - Fabric mask tutorial - Making the pleats

8 - Sew along both sides, less than a quarter inch from the edge, to hold down the pleats.
8 - Cousez le long des deux côtés, à moins d'un quart d'inch du bord, pour maintenir les plis en place.

Luna Lovequilts - Fabric mask tutorial - Making the pleats


9 - Preparing the bias  - Without a tool
Cut two strips of 2" (width) x 34" (long). Fold the strip in half lengthwise with wrong side together and make a crease with your fingernail (or press). Fold long sides in so raw edges meet at the crease in the center and press. Fold a quarter inch on both short ends of the bias. Refold on creases and press carefully to get a 1/2" bias tape.

9 - Préparation du biais - Sans outil
Coupez deux bandes de 2" (largeur) x 34" (longueur). Pliez la bande en deux dans le sens de la longueur, mauvais côtés ensemble et marquez un pli avec l'ongle (ou le fer). Pliez à nouveau vers l'intérieur de manière à ce que les bords bruts se rejoignent au centre le long du pli et repassez. Pliez vers l'intérieur environ un quart d'inch à chaque extrémité du biais. Repliez sur les plis et repassez soigneusement pour obtenir un biais de 1/2".

Luna Lovequilts - Fabric mask tutorial - Bias making

9 - Preparing the bias  - With a tool
Cut two WOF strips. Cut one end of each strip diagonally to make it easier. Starch helps as well ! Use the tool to make the bias and trim it to 34". Fold a quarter inch on both short ends of the bias. Fold in half and press to get a 1/2" bias tape.

9 - Préparation du biais - Avec outil
Coupez deux bandes dans toute la largeur du tissu. Coupez une extrémité de chaque bande dans la diagonale pour faciliter. Le spray de repassage aide aussi ! Utilisez l'outil pour préparer le biais et égalisez-le à 34".  Pliez vers l'intérieur environ un quart d'inch à chaque extrémité du biais. Pliez le biais en deux et repassez pour obtenir un biais de 1/2".

Luna Lovequilts - Fabric mask tutorial - Bias making

10 - Mark the center of the bias tape. Pin the half point at the middle of the mask.
10 - Marquez le milieu du biais. Epinglez-le sur le côté du masque, au centre.

Luna Lovequilts - Fabric mask tutorial - Attaching the ties

11 - Pin the bias tape to mask side and sew from one end of the bias to the other, backstitching at both ends.
11 - Epinglez le biais sur le côté du masque et cousez d'un bout à l'autre du biais, avec des points arrières à chaque extrémité.

Luna Lovequilts - Fabric mask tutorial - Attaching the ties

Done !
Terminé !

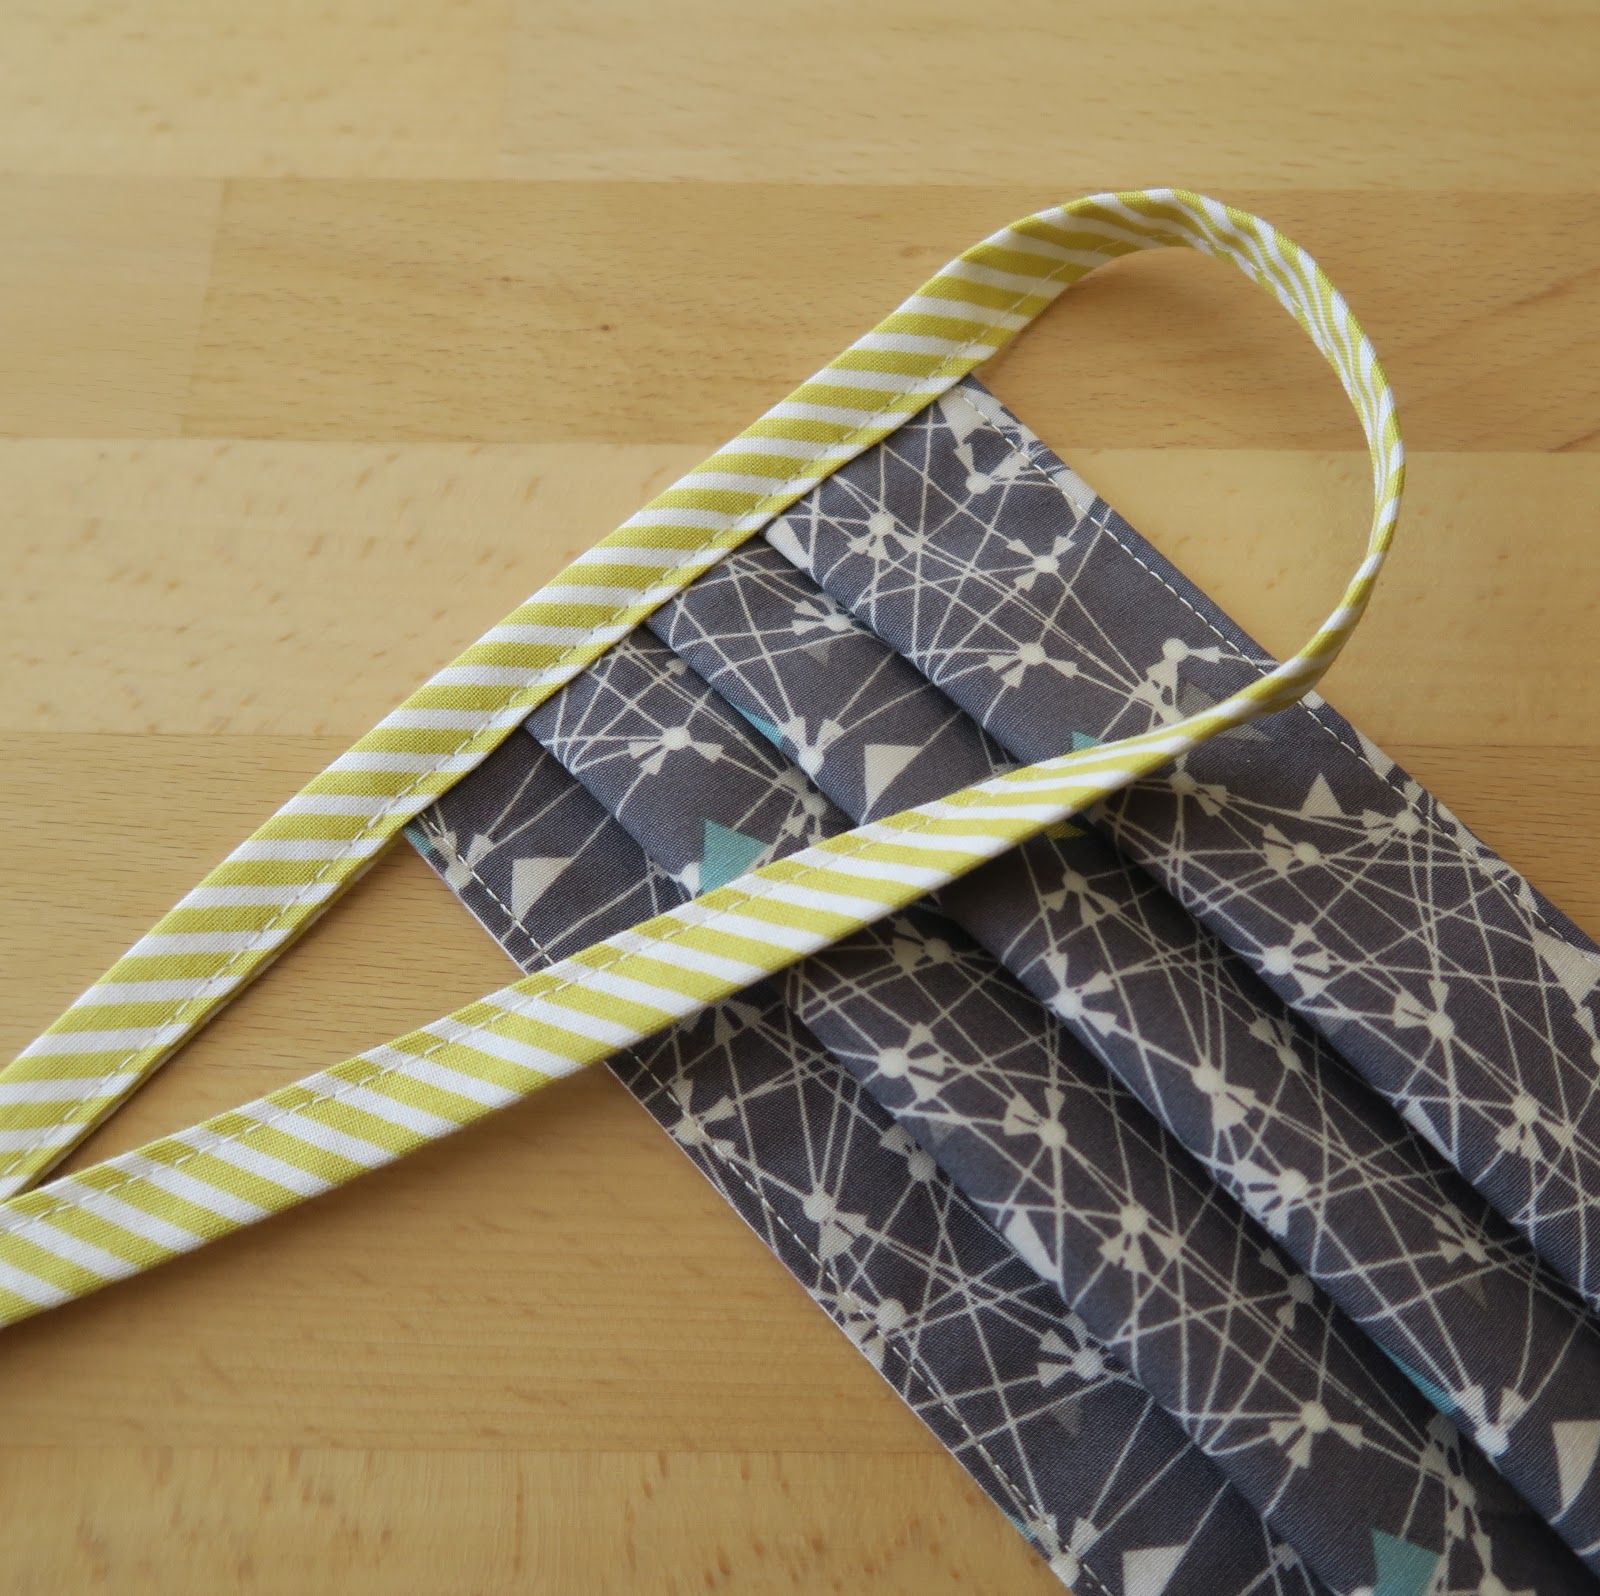
Luna Lovequilts - Fabric mask tutorial - Three layers and ties

And this is what you will look like ...
Et c'est à ça que vous allez ressembler ...

Luna Lovequilts - Fabric mask tutorial - Three layers and ties

Anybody else desperately needs a haircut ?! :-))
Est-ce que quelqu'un d'autre a désespérément besoin d'aller chez le coiffeur ?! :-))


vendredi 27 mars 2020

Machine straight line quilting

🖂 🖂 🖂

First, just a quick note to mention that a few people left comments recently that I am not able to answer to. I don't know why but it has happened more frequently these past months ... If you wrote a comment and never heard from me it is probably because your email address is hidden and then I have no means to contact you. Irene, JC in TX, ... and a few "Unknown" ... ;-) if you would like to get in touch please send me an email. You can use the 'envelope' icon on the right side bar of the blog.

D'abord, juste une petite note pour mentionner que quelques personnes ont récemment laissé des commentaires auxquels je ne peux pas répondre. Je ne sais pas pourquoi mais c'est arrivé plus fréquemment ces derniers mois ... Si vous avez écrit un commentaire et jamais eu de mes nouvelles, c'est probablement parce que votre adresse email est masquée et donc je n'ai aucun moyen de vous contacter. Irene, JC in TX, ... et quelques "Inconnu" ... ;-) si vous avez envie d'entrer en contact, envoyez-moi un email. Vous pouvez utiliser l'icône "enveloppe" sur la barre latérale droite du blog.

🖂 🖂 🖂

I am regularly asked questions about my machine quilting and I decided to summarize all details that came to my mind in one post.

✎ Please note that I do machine straight line quilting only (and hand quilting). I have no experience in free motion. And do not expect to hear an amazing secret ... :-) It is just a description of how I do it. But I hope you will find some useful information anyway !

Régulièrement, on me pose des questions sur mon quilting machine et j'ai décidé de récapituler tout ce qui me venait à l'esprit dans un article.

✎ A noter que je ne fais que du quilting machine au point droit (et du quilting main). Je n'ai aucune expérience en piqué libre. Et ne vous attendez pas à apprendre un secret extraordinaire ... :-) C'est juste une description de ma manière de procéder. Mais j'espère que vous trouverez quand même des informations intéressantes !


Luna Lovequilts - Machine straight line quilting close-up


Ready for a pretty long post ?! Here we go ...

✂✂✂

I am very careful to the preparing steps (ironing and basting). I always thread baste my three layers (as for hand quilting). Except for mini quilts and cushion covers for which I just use long pins. If you are interested in a step-by-step description you can find one named 'Quilt basting' on my Tutorial page.

Je suis très attentive aux étapes de préparation (repassage et faufilage). Je faufile toujours mes trois couches (comme pour le quilting main). Sauf dans le cas des mini quilts et des housses de coussin pour lesquels j'utilise seulement de longues épingles. Si vous êtes intéressé par une description pas-à-pas, vous pouvez en trouvez une sous le nom "Quilt basting" sur ma page Tutorial.

Luna Lovequilts - Machine straight line quilting - In progress

✂✂✂

If my piecing design requires an accurate quilting design, I mark all the lines with an erasable pen / pencil. If that is not the case, I just mark a few lines and then use the width of the presser foot to line up. I still decide on my quilting design as described in this blog post which dates back to 2017.

Si mon design d'assemblage demande un dessin de quilting précis, je marque toutes les lignes avec un stylo / crayon effaçable. Si ce n'est pas le cas, je marque seulement quelques lignes et ensuite j'utilise la largeur du pied de biche pour m'aligner. Je décide encore de mon dessin de quilting comme décrit dans cet article qui date de 2017.

Luna Lovequilts - Machine straight line quilting close-up


✂✂✂

My sewing machine is a Pfaff performance 5.0 with integrated dual feed system and then I don't need to use a specific presser foot. I use the regular straight stitch and set the stitch length to 3. I use the 'needle down' feature which is helpful when you have to stop in the middle of a line.

The large sewing space on the right of the needle allows for laying the quilt rolled-up. I have worked with pieces up to 75 inches (190 centimeters) so far. We don't use any bed cover so my largest quilts are Throw size.

Ma machine à coudre est une Pfaff performance 5.0 avec le système de double entraînement intégré et je n'ai donc pas besoin d'utiliser un pied spécifique. J'utilise le point droit standard et je règle la longueur du pont à 3. J'active la fonction "aiguille en bas" qui est très utile quand on doit s'arrêter au milieu d'une ligne. 

L'espace large à droite de l'aiguille permet de mettre le quilt roulé. J'ai travaillé jusqu'à maintenant avec des pièces jusqu'à 75 inches (190 centimetres). Nous n'utilisons pas de couvre-lit, donc mes plus grands quilts sont des couvertures.

Luna Lovequilts - Machine straight line quilting - In progress


✂✂✂

I work on a large table with a lot of space behind the sewing machine. The tension on the fabric is consistent since the quilt lays on the table and is never pulled down. There is no wall or anything else on the table (not even my cutting mat) that could block the moving of quilt.

Je travaille sur une table large, avec beaucoup d'espace derrière la machine. La tension sur le tissu est constante car le quilt est posé sur la table et jamais tiré contre le bas. Il n'y a pas de paroi ou quoi que ce soit sur la table (même pas ma planche de coupe) qui pourrait bloquer l'avance du quilt. 

Luna Lovequilts - Machine straight line quilting - In progress


✂✂✂

I let the machine feed the quilt by itself. I mean I never push or pull the quilt to help moving forward. I use my hands only to hold the quilt and guide it under the presser foot.

I roll the quilt so that it completely lays, in the width, on the extension table of my sewing machine. When I start to stitch from the border, it lays on my knees or my shoulder depending on the size of the quilt.

Je laisse la machine entraîner le quilt toute seule. Je veux dire que je ne pousse jamais ni ne tire sur le quilt pour aider à faire avancer. J'utilise mes mains seulement pour soutenir le quilt et le guider sous le pied de la machine.

Je roule le quilt de manière à ce qu'il repose complètement, dans la largeur, sur la table d'extension de ma machine. Quand je commence à quilter depuis le bord, il est posé sur mes genoux ou mon épaule selon la taille du quilt.

Luna Lovequilts - Machine straight line quilting - In progress


✂✂✂

I don't go very fast and I even slow down when I stitch through a lot of seams. If necessary, I go one stitch at a time.
I may add a few pins if I think my stitching line could be deviated because of the seams or if the fabric tend to pucker.

Je ne vais pas très vite et je ralentis même quand je quilte à travers des coutures épaisses. Si nécessaire, j'avance point par point.
Il m'arrive d'ajouter quelques épingles si je pense que ma ligne pourrait être déviée à cause des coutures ou si le tissu a tendance à plisser.

Luna Lovequilts - Machine straight line quilting - In progress


✂✂✂

For most of my projects, I use a very thin cotton batting. But this one below is an example with wool batting. The wool batting combined to cotton / linen fabric was more difficult to work with of course ... and required a few pins in addition to the thread basting ... I usually work with Quilters Dream Batting brand 

Pour la plupart de mes projets, j'utilise un molleton coton très fin. Mais celui ci-dessous est un exemple avec un molleton laine. Le molleton laine combiné à un tissu mélangé coton / lin était bien sûr plus compliqué à travailler ... et a nécessité quelques épingles en plus du faufil ...

Luna Lovequilts - Machine straight line quilting - In progress

The result on the back of the quilt is good anyway.
Malgré tout, le résultat sur le dos du quilt est bon.

Luna Lovequilts - Machine straight line quilting - Back of the quilt

✂✂✂

For non edge-to edge quilting designs, I bury all my threads. You can find a description in this blog post. I know ... ;-) It takes more time than the quilting itself ... I don't bury threads one by one but I alternate between stitching and burying threads periods. Doing that way, you have to be careful to not getting the threads tangled on the back of the quilt ...

Pour les dessins de quilting non bord-à-bord, j'arrête tous mes fils. Vous pouvez trouver une description dans cet articleJe sais ... ;-) Cela prend plus de temps que le quilting lui-même ... Je n'arrête pas les fils un à un mais j'alterne entre des périodes de couture et d'arrêt de fils. En faisant de cette manière, il faut être attentif à ce que les fils ne s'emmêle pas au dos du quilt ...

Luna Lovequilts - Machine straight line quilting - In progress


✂✂✂

I am used to quilt with Aurifil threads but I haven't really experiences with other brands for comparison. I like the 40 wt but sometimes use the 50 wt depending on my stash. I usually put the same thread in the bobbin. I recently tried the 28 wt and it worked very well (with a 40 wt thread in the bobbin).

J'ai l'habitude de quilter avec les fils Aurifil mais je n'ai pas vraiment d'expérience avec d'autres marques pour comparer. J'aime l'épaisseur 40 mais j'utilise parfois le no 50 en fonction de ce que j'ai sous la main. En général, je mets le même fil dans la canette. J'ai essayé récemment le no 28 et cela a bien marché (avec un no 40 dans la canette).


Luna Lovequilts - Machine straight line quilting - Threads

✂✂✂

Where to start ... It depends of course of the quilting design. For the project I am quilting at the moment, the lines are slightly diagonal with a change of direction in the middle of the quilt. So for each line, I start in the middle and stitch towards the border.

Où commencer ... Cela dépend bien sûr du dessin de quilting. Pour le projet que je quilte en ce moment, les lignes sont légèrement en diagonale avec un changement de direction au milieu du quilt. Donc pour chaque ligne, je commence au milieu et quilte en direction du bord.

Luna Lovequilts - Machine straight line quilting close-up

In case I work on a edge-to-edge design, I start from the border (in the middle of one side) and stitch all lines in one direction. Then I turn the quilt and start again from opposite border. I quilt all the lines in the other direction to fill the second half of the quilt. See directions on the picture below.

Dans le cas où je travaille avec un dessin bord-à-bord, je commence depuis le bord (au milieu d'un des côtés) et je quilte toutes les lignes dans une direction. Ensuite je tourne le quilt et recommence depuis le bord opposé. Je quilte toutes les lignes dans l'autre direction pour remplir la deuxième moitié du quilt. Voir les indications sur la photo ci-dessous.


Luna Lovequilts - Machine straight line quilting - Where to start

I do it the same way for a grid design. I stitch first all horizontal lines, in two steps, and then all vertical lines, in two steps as well.

Je procède de même pour un dessin de grille. Je quilte d'abord toutes les lignes horizontales, en deux temps, et ensuite toutes les lignes verticales, en deux temps également.

Luna Lovequilts - Machine straight line quilting close-up


Sometimes I want to highlight a specific part of the piecing design or add new patterns. In this case, I mark and stitch first all these additional patterns and then I fill the areas around with straight lines.

Parfois, j'ai envie de souligner une partie spécifique de l'assemblage ou d'ajouter des nouveaux motifs. Dans ce cas, je marque et quilte d'abord toutes ces motifs supplémentaires et ensuite je remplis autour avec des lignes droites.


Luna Lovequilts - Machine straight line quilting - In progress


✂✂✂

Another important thing is cleaning your machine ... I do it regularly and every time I am surprised by the dust accumulated in the meantime. I did it two days before I took this picture ... Changing the needle from time to time is not bad either ;-)

Une autre chose importante est de nettoyer votre machine. Je le fais régulièrement et à chaque fois je suis surprise par la poussière accumulée entre temps. Je l'ai fait deux jours avant cette photo ... Changer l'aiguille de temps en temps n'est pas mal non plus ;-)

Luna Lovequilts - Machine cleaning

✂✂✂


Machine straight line quilting is often associated with the idea of fast and easy, right ?! But maybe the secret is ... Take the time ?! 
Just let me know if you have any question !

Le quilting machine au point droit est souvent associé à l'idée de vite fait, n'est-ce pas ?! Mais peut-être que le secret c'est ... Prendre du temps ?! 
N'hésitez pas à me poser des questions !


I am linking up with Kelly for NTT


mardi 21 janvier 2020

New project - Inspired by a mural

When I posted my list of projects last week, I put first a new project inspired by a mural I saw in Nashville. I made a lot of progress over the weekend and here is what it looks like now !

Quand j'ai publié ma liste de projets la semaine dernière, j'ai mis en priorité un nouveau projet inspiré par une murale que j'ai vue à Nashville. J'ai beaucoup avancé pendant le week-end et voilà à quoi il ressemble maintenant !

Luna Lovequilts - A new quilting project - Inspired by a mural in Nashville

For the first time I decided to draw the whole design to its actual size on paper. This quilt will be about 38" x 48" (96 x 122 cm). I chose to use Freezer Paper, first because it is a roll and so less assembling was needed than if I worked with standard size paper ...

Pour la première fois, j'ai décidé de tracer le design complet, grandeur nature, sur papier. Ce quilt mesurera environ 38" x 48" (96 x 122 cm). J'ai choisi d'utiliser du Freezer Paper, d'abord parce qu'il est en rouleau et donc nécessitait moins d'assemblage que si j'avais travaillé avec du papier taille standard ...

Luna Lovequilts - New quilting project - Whole design drawn on paper

I divided the design into 23 units and cut them out. As you can see the pieces are almost all different in size and shape. So the best option was to work with foundation paper piecing technique.
I am working with the method I learned at Jenny's class last November which consists in folding the paper instead of sewing on it. I would not choose this method for tiny pieces like in my So Dearly quilt but this new project seemed appropriate.

J'ai divisé mon design en 23 unités et je les ai découpées. Comme vous pouvez le voir, les pièces sont presque toutes différentes en taille et forme. Donc la meilleure option était de travailler avec la technique de couture sur papier.
Je travaille avec la méthode que j'ai apprise au cours de Jenny en novembre dernier qui consiste à plier le papier au lieu de coudre dessus. Je ne choisirais pas cette méthode pour de petites pièces  comme dans mon So Dearly quilt mais ce nouveau projet semblait approprié.

Luna Lovequilts - New quilting project - Foundation paper piecing using Freezer Paper

This method allows me to open my seams and most importantly to keep the templates intact in case I need them later in the process.

Cette méthode me permets d'ouvrir mes coutures et surtout de conserver les gabarits intacts au cas où j'en aurais besoin plus tard dans la réalisation.

Luna Lovequilts - New quilting project - Foundation paper piecing using Freezer Paper

To prevent the seam allowance from fraying when I peel off the Freezer Paper (like for the green fabric on the picture below ...), I gently slide a tool between the paper and the seam before removing the paper.

Pour éviter que la marge de couture ne s'effiloche quand je décolle le Freezer Paper (comme pour le tissu vert sur la photo ci-dessous ...), je glisse doucement un outil entre le papier et la couture avant de retirer le papier.

Luna Lovequilts - New quilting project - Removing Freezer Paper

The circles are hand appliqued using the traditional method with a cardboard template and basting thread. You can see the step-by-step method on my Tutorial page.

Les cercles sont appliqués à la main en utilisant la méthode traditionnelle avec un gabarit carton et du faufil. Vous pouvez voir la méthode pas-à-pas sur ma page Tutorial.

Luna Lovequilts - New quilting project - Hand appliqued circles

I already shared it in a previous blog post about Quiltcon 2019 but here is the picture I used as a source of inspiration. You can see the mural in full and some 'making of' pictures here.

Je l'ai déjà montrée dans un article précédent à propos de Quiltcon 2019 mais voici la photo que j'ai utilisée comme source d'inspiration. Vous pouvez voir la murale en entier et des photos de la réalistion ici.

Luna Lovequilts - A mural I saw in Nashville


I am linking up with Kelly for NTT


samedi 27 janvier 2018

Hiding quilting thread ends

Earlier this week I had a discussion with an IG friend on how to hide threads when machine quilting. She thinks this topic could interest other people and suggested that I share my method. And this suggestion was very welcome since I haven't really significant progress to blog about this week :-)
I only pieced some extra blocks for my improv curves project and I am now joining them together.

Cette semaine, j'ai eu une discussion avec une amie Instagram à propos de comment arrêter les fils dans le cas du quilting machine. Elle pense que le sujet pourrait intéresser d'autres personnes et m'a suggéré de partager ma méthode. Et cette suggestion était vraiment bienvenue car je n'ai pas vraiment de progrès significatif dans mes projets à bloguer cette semaine :-) 
J'ai seulement réalisé quelques blocs supplémentaires pour mon projet de courbes improvisées et je suis maintenant en cours d'assemblage.

Luna Lovequilts - Improv curves - Work in progress

When you choose a quilting design which is not 'edge to edge', you have to deal with two threads (bobbin thread and top thread) at the beginning and at the end of the line of stitching. I prefer hiding these thread tails within the layers than securing with backstitches or several stitches at the same place.

Quand on choisit un design de quilting qui n'est pas "bord à bord", on doit s'occuper de deux fils (fil de canette et fil du dessus) au début et à la fin de chaque ligne. Je préfère cacher ces extrémités de fil à l'intérieur des couches plutôt que de sécuriser avec des points arrière ou plusieurs points à la même place.

Luna Lovequilts - Tutorial - Hiding quilting thread ends

Working from the top of the quilt, I first take out the extra stitches. {I often make a couple of stitches outside of the traced line since I find it difficult to start / stop at a very precise place with a fully electronic sewing machine. } Then I thread the end onto a needle and put the needle down through the three layers in the same hole where the thread is.
You can work from the backside of the quilt too and pull the thread from the backside.

En travaillant depuis le top du quilt, je défais d'abord les points en trop. { Je fais souvent quelques points en dehors de la ligne tracée car je trouve difficile de commencer / finir à un endroit très précis avec une machine à coudre entièrement électronique. } Ensuite, j'enfile l'extrémité sur une aiguille et je pique l'aiguille à travers les trois couches dans le même trou que le fil. 
Vous pouvez également travailler depuis l'arrière du quilt et tirer le fil depuis l'arrière.

Luna Lovequilts - Tutorial - Hiding quilting thread ends

Bobbin thread and top thread are now both on the back of the quilt. Using both thread tails I tie a tight knot and then a second one over it.

Le fil de canette et le fil du dessus se trouvent maintenant tous les deux au dos du quilt. En utilisant les deux extrémités, je fais un noeud serré et ensuite un deuxième par dessus.

Luna Lovequilts - Tutorial - Hiding quilting thread ends

I thread both ends onto a needle. I insert the needle in the same hole where the knot is and run the threads through the batting. I trim then excess thread.

J'enfile les deux extrémités sur une aiguille. J'insère l'aiguille dans le trou où se trouve le noeud et je passe les fils dans le molleton. Je coupe ensuite l'excédent de fil.

Luna Lovequilts - Tutorial - Hiding quilting thread ends

Visually I have small knots on the backside but I think the result is okay. You can see on the picture below on the left a continuous line and a knot on the right.

Visuellement, j'ai des petits noeuds sur l'arrière du quilt mais je trouve que le résultat est acceptable. Vous pouvez voir sur la photo ci-dessous, à gauche une ligne continue et un noeud à droite.

Luna Lovequilts - Tutorial - Hiding quilting thread ends

Okay ... I admit this method is really tedious and time consuming ... And you, how do you hide your quilting thread tails ?! I would love to hear about your favourite process and tips. Please share in the comments so that everyone can benefit !

D'accord ... je reconnais que cette méthode est vraiment fastidieuse et prend du temps ... Et vous, comment cachez-vous vos fils ?! J'aimerais beaucoup connaître votre méthode préférée et vos astuces. Merci de partager dans les commentaires pour que chacun puisse en bénéficier !


lundi 27 novembre 2017

How I choose a quilting design

For some projects I settle on the quilting design already during the assembly step. But if I have no particular plan I sketch a few designs before getting into the quilting. I took a few picture to show you my process.
Pour certains projets, je suis déjà fixée sur le design du quilting lors de l'étape d'assemblage. Mais si je n'ai pas d'idée particulière, je dessine quelques possibilités avant de me lancer dans le quilting. J'ai pris quelques photos pour vous montrer ma démarche.


Luna Lovequilts - Detail of hand quilting on my Feux Follets quilt
Detail of the quilting design on my Feux Follets quilt

First I take a picture of the top making sure my camera is straight to avoid a perspective effect.
I prefer working on a picture of the top alone rather than the three layers but I sometimes forget to take the picture before basting ...
For small size quilts I pin the top against my design wall. I lay the larger quilts flat on the floor and sometimes have to stand on a chair or on my desk to take the picture. Well ... I hope I won't break my leg during a quilt photo shoot ... ;-)
So depending on the size of your quilt, if you take a picture without deforming you should see your feet :-))

D'abord, je prends une photo du top en m'assurant que mon appareil est bien droit pour éviter un effet de perspective.
Je préfère travailler sur une photo du top seul plutôt que des trois couches, mais il m'arrive d'oublier de prendre la photo avant de faufiler ...
Pour les petits formats, j'épingle le top contre mon panneau de conception. Je pose les quilts plus larges à plat sur le sol et je dois parfois me tenir debout sur une chaise ou sur mon bureau pour prendre ma photo. Bon ... J'espère ne pas me casser une jambe pendant une séance photo ... ;-)
Donc en fonction de la taille de votre quilt, si vous prenez une photo sans déformation, vous devriez voir vos pieds :-))

Luna Lovequilts - How I choose a quilting design - Picture with deformation Luna Lovequilts - How I choose a quilting design - Picture of the quilt top

The rest is safer ... On my computer, I include the picture in a Word document, crop it (to remove the feet for example) and resize it to page size.
Then I change the printing settings to get the picture in gray scale. If I think the printed picture is too dark I photocopy or print it again changing contrast / intensity settings. Actually this step depends on the possibilities of your printer.

La suite est plus sûre ... Sur mon ordinateur, j'inclus la photo dans un document Word, je la recadre (pour supprimer les pieds par exemple) et je la redimensionne à la taille de la page.
Ensuite je modifie les paramètres d'impression pour obtenir l'image en échelle de gris. Si je trouve que l'image imprimée est trop foncée, je photocopie ou l'imprime à nouveau en changeant les paramètres de contraste / intensité. En fait, cette étape dépend des possibilités de votre imprimante.

Luna Lovequilts - How I choose a quilting design - Printed picture in gray scale

Once I am happy with colour intensity I print a few copies. I often use one of the copies for sketching every design that comes to my mind. It allows me to narrow the possible choices quickly enough. For example though I love spiral quilting design I gave up the idea for this project right away.

Dès que je suis contente de l'intensité des couleurs, j'imprime quelques copies. J'utilise souvent une des copies pour dessiner toutes les idées qui me passent par la tête. Cela me permet de restreindre assez rapidement les choix possibles. Par exemple, bien que j'adore le dessin de quilting en spirale, j'ai directement abandonné l'idée pour ce projet.

Luna Lovequilts - How I choose a quilting design - First sketches

I explore a little further the ideas that are worth a try. I use a pencil to be able to erase if necessary.
J'explore un peu plus les idées qui en valent la peine. J'utilise un crayon pour pouvoir effacer si nécessaire.

Luna Lovequilts - How I choose a quilting design - Exploring ideas

After having worked on a few sketches usually basic ideas emerge and I settle on a part of the design. In that case I trace the partial design with a colour pen on a blank copy and then photocopy it a few times. For this project I decided to emphasize the large zig-zag shape and some of the small triangles.

Après avoir travaillé sur quelques croquis, en général, des idées de base ressortent et je suis fixée sur une partie du dessin. Dans ce cas, je trace le dessin partiel avec un stylo de couleur sur une copie vierge et je la photocopie plusieurs fois. Pour ce projet, j'ai décidé de souligner la grande forme en zig-zag et quelques petits triangles.

Luna Lovequilts - How I choose a quilting design - Partial design

This version become the new starting point and taking into consideration the traced lines I continue sketching different options.
At this stage I trace lines without really worrying about actual spacing. This question comes later, when the design is chosen.

Cette version devient le nouveau point de départ et en tenant compte des lignes tracées je continue à dessiner différentes options.
A ce stade, je trace les lignes sans vraiment me préoccuper de l'espacement réel. Cette question vient plus tard, quand le motif est choisi.

Luna Lovequilts - How I choose a quilting design - Sketching different options

As a rule I think about  :
- How the quilt will be used ? Is my project a wall hanging or a lap quilt ? I will choose a denser quilting for a wall hanging (from 1/4" to 1/2" spacing).
- Will I hand or machine quilt it ?
- Do I prefer a quilting design that emphasize blocks or on the contrary an overall design ? On an improv quilt I usually go for an overall and dense quilting design since I think the overall effect and texture matter in that case.
- Will I add a secondary motif with the quilting ?
- And a practical issue ... How will I trace the design on the top ?

De manière générale, je réfléchis à :
- Comment le quilt sera utilisé ? Est-ce que mon projet est un panneau mural ou un quilt utilitaire ? Je vais choisir un quilting plus dense pour un panneau mural (espacement de 0.6 cm à 1.2 cm).
- Est-ce que je vais le quilter à la main ou à la machine ?
- Est-ce que je préfère un dessin de quilting qui souligne les blocs ou au contraire un dessin global ? Sur un quilt impro, en général, j'opte pour un dessin global et dense car je trouve que l'effet d'ensemble et la texture ont une importance dans ce cas.
- Est-ce que je vais ajouter un motif secondaire avec le quilting ?
- Et une question pratique ... Comment est-ce que je vais tracer le dessin sur le top ?


Luna Lovequilts - Secondary design on my Opalescence quilt
Secondary design on my Opalescence quilt

And the last decision ... Do I want a colour thread that blend with the fabrics or a contrasted colour that stand out ? My favourite choice at the moment is a neutral thread for the most part of the design and a colour thread to highlight some areas.

Et la dernière décision ... Est-ce que je veux une couleur de fil qui se mélange avec les tissus ou une couleur contrastée qui ressort ? Mon choix préféré en ce moment est un fil neutre pour la plus grande partie du design et un fil de couleur pour souligner quelques zones.

Luna Lovequilts - How I choose a quilting design - Thread colour choice

I work this way for both hand and straight line machine quilting. Even for very simple quilting designs. It helps me choosing between a regular or irregular grid, diagonal or horizontal straight lines, ...

Je travaille de cette manière autant pour le quilting main que machine en lignes droites. Même pour les dessins de quilting très simples. Cela m'aide à choisir entre un quadrillage régulier ou irrégulier, des lignes droites en diagonale ou horizontales, ... 

Luna Lovequilts - Straight line quilting in progress

All that being said ... I sometimes change my plans as I go, for the density or the use of a thread or a detail of the design.
Cela dit ... Je change parfois mes plans en cours de route, pour la densité ou l'utilisation d'un fil ou un détail du motif.


I am linking up with Gosia for Quilter's MondayKelly for NTT 
and with Yvonne for the monthly Tips and tutorials Tuesday