Quand j'ai décidé de réaliser quelques masques la semaine dernière, j'ai lu plusieurs tutoriels et publications. J'ai choisi la version qui me parlait le plus parmi toutes celles disponibles sur Internet et pour laquelle j'avais toutes les fournitures. Je n'avais pas d'élastique dans mon stock, donc j'ai opté pour les attaches. C'est peut-être une meilleure option dans l'idée de lavages répétés. J'ai aussi entendu dire que les élastiques peuvent irriter autour des oreilles sur une longue durée.
I compiled here some information and step-by-step instructions.
J'ai réuni ici des informations et les instructions pas-à-pas.
✂✂✂
1 - Prewash your fabrics. Use preferably 100% cotton fabric because of frequent washing. Quilting fabrics work well !
It is a three-layers mask so you will need a front, a back and an inside piece of fabric for each mask as well as strips for the ties.
Use preferably two different fabrics so that it will be easy to identify the front and back of the mask.
For the inside fabric I use a light solid fabric which is tightly woven and that I don't like to use in my quilting projects for that reason ...
1 - Prélavez vos tissus. Utilisez de préférence du tissu 100% coton à cause des lavages fréquents. Les tissus qualité patchwork vont bien !
C'est un masque à trois couches donc vous aurez besoin d'un morceau de tissu pour le devant, le dos et l'intérieur, ainsi que des bandes pour les attaches.
Utilisez de préférence deux tissus différents pour pouvoir identifier facilement le devant et le dos du masque.
Pour le tissu intérieur, j'utilise un tissu clair uni qui est tissé très serré et que je n'aime pas utiliser dans mes projets de quilting pour cette raison ...
✂✂✂
2 - Cut a 9" (width) x 8" (height) piece of each of your three fabrics. This size fits my son and me for example.
2 - Coupez une pièce de 9" (largeur) x 8" (hauteur) dans chacun de vos trois tissus. En centimètres, environ 23 x 21 cm. Cette taille convient pour mon fils et moi par exemple.

3 - Layer your three pieces. First the inside fabric and then place on top back and front pieces right sides together.
3 - Empiler vos trois pièces. D'abord le tissu intérieur et ensuite placez au-dessus les pièces devant et dos, bon côté contre bon côté.

4 - Pin and stitch the three layers together a quarter inch from the edge, along the two 9" sides (top and bottom of the mask).
4 - Epinglez et cousez ensemble les trois couches à un quart d'inch du bord, le long des deux côtés de 9" (haut et bas du masque).

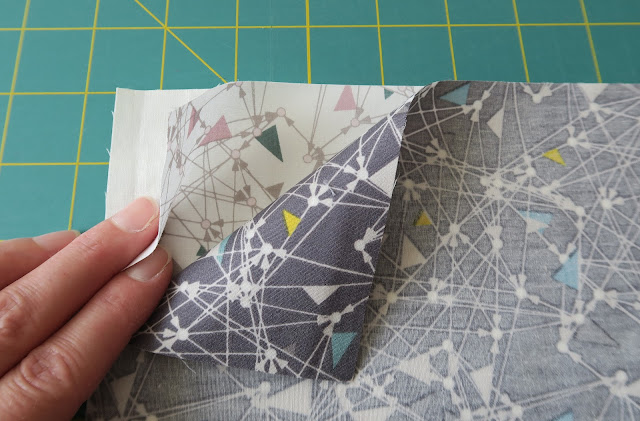
5 - Turn right sides out and press carefully. Top stitch along the two sides. Your piece should be 9" x 7.5".
5 - Tournez la pièce dans le bon sens et repassez soigneusement. Surpiquez le long des deux côtés. Votre pièce devrait mesurer environ 9" x 7.5"

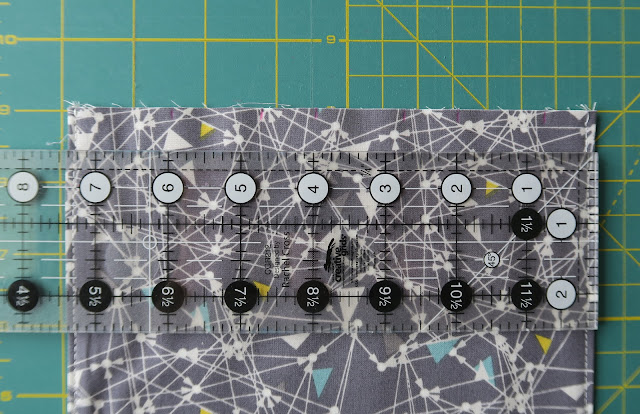
6 - If like me you need to have precise measurements to make even pleats you can follow the diagram below ... ;-) But uneven pleats work too and you can skip this step ... Mark the placement of the pleats with a pen, starting from the bottom, on both sides of the mask (six marks on each side in all).
6 - Si comme moi vous aimez avoir des mesures précises pour réaliser les plis vous pouvez suivre le diagramme ci-dessous ... ;-) Mais des plis irréguliers marchent aussi et vous pouvez ignorer cette étape ... Marquez l'emplacement des plis avec un stylo, en partant du bas, sur les deux côtés du masque (en tout six repères de chaque côté).


7 - Bring one mark over to the next to make the pleat and pin in place. All pleats are in the same direction, towards the bottom of the mask.
7 - Faites coïncider chaque repère avec le suivant pour créer le pli et épinglez. Tous les plis sont dans le même sens, contre le bas du masque.


8 - Sew along both sides, less than a quarter inch from the edge, to hold down the pleats.
8 - Cousez le long des deux côtés, à moins d'un quart d'inch du bord, pour maintenir les plis en place.
9 - Preparing the bias - Without a tool
Cut two strips of 2" (width) x 34" (long). Fold the strip in half lengthwise with wrong side together and make a crease with your fingernail (or press). Fold long sides in so raw edges meet at the crease in the center and press. Fold a quarter inch on both short ends of the bias. Refold on creases and press carefully to get a 1/2" bias tape.
9 - Préparation du biais - Sans outil
Coupez deux bandes de 2" (largeur) x 34" (longueur). Pliez la bande en deux dans le sens de la longueur, mauvais côtés ensemble et marquez un pli avec l'ongle (ou le fer). Pliez à nouveau vers l'intérieur de manière à ce que les bords bruts se rejoignent au centre le long du pli et repassez. Pliez vers l'intérieur environ un quart d'inch à chaque extrémité du biais. Repliez sur les plis et repassez soigneusement pour obtenir un biais de 1/2".

9 - Preparing the bias - With a tool
Cut two WOF strips. Cut one end of each strip diagonally to make it easier. Starch helps as well ! Use the tool to make the bias and trim it to 34". Fold a quarter inch on both short ends of the bias. Fold in half and press to get a 1/2" bias tape.
9 - Préparation du biais - Avec outil
Coupez deux bandes dans toute la largeur du tissu. Coupez une extrémité de chaque bande dans la diagonale pour faciliter. Le spray de repassage aide aussi ! Utilisez l'outil pour préparer le biais et égalisez-le à 34". Pliez vers l'intérieur environ un quart d'inch à chaque extrémité du biais. Pliez le biais en deux et repassez pour obtenir un biais de 1/2".


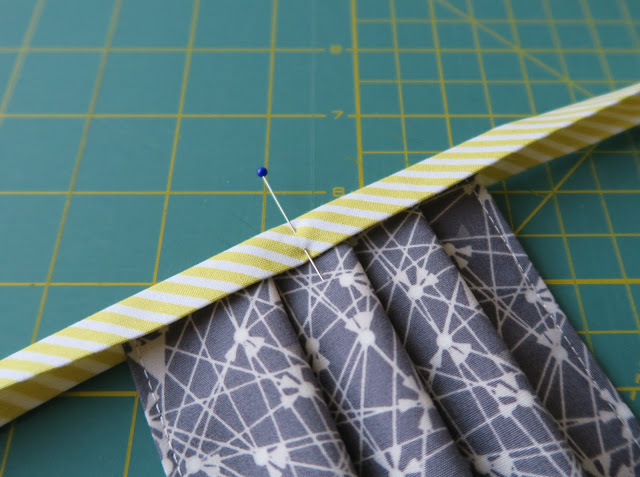
10 - Mark the center of the bias tape. Pin the half point at the middle of the mask.
10 - Marquez le milieu du biais. Epinglez-le sur le côté du masque, au centre.

11 - Pin the bias tape to mask side and sew from one end of the bias to the other, backstitching at both ends.
11 - Epinglez le biais sur le côté du masque et cousez d'un bout à l'autre du biais, avec des points arrières à chaque extrémité.

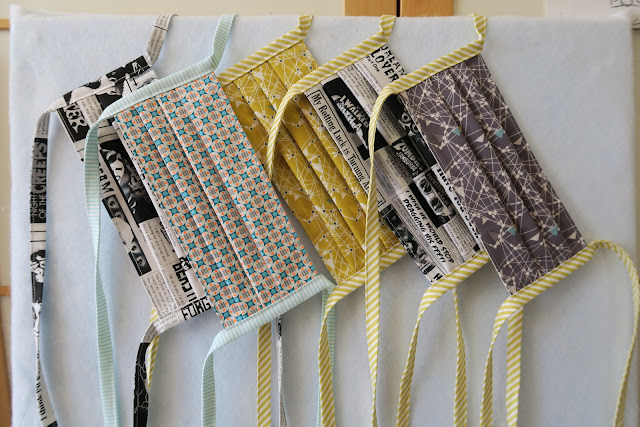
Done !
Terminé !

And this is what you will look like ...
Et c'est à ça que vous allez ressembler ...
Anybody else desperately needs a haircut ?! :-))
Est-ce que quelqu'un d'autre a désespérément besoin d'aller chez le coiffeur ?! :-))


